Move your WordPress site within the same domain
This guide shows you how to manually move your WordPress site to another location on the same domain: for example, from the main domain to a subdomain, or the other way around.
Instead of moving your site manually, we recommend using our 1-click migration tool which is available in most hosting plans.
Before you start moving your WordPress installation, check that your current site is working.
Did you know?
If you can't use our 1-click migration tool and don't want the hassle of migrating your website yourself, our WP Site Migration service can help you.Use the contact form for Premium Care to get details, pricing, and priority assistance.
Before you begin
We are currently migrating our customer's websites to new servers, and depending on whether your website has already been migrated or not, there are slight differences in how you can update WordPress manually. This guide is divided into two parts which explain the different methods. Please open the relevant guide below the Control Panel screenshots.
How do I know if my website has been migrated?
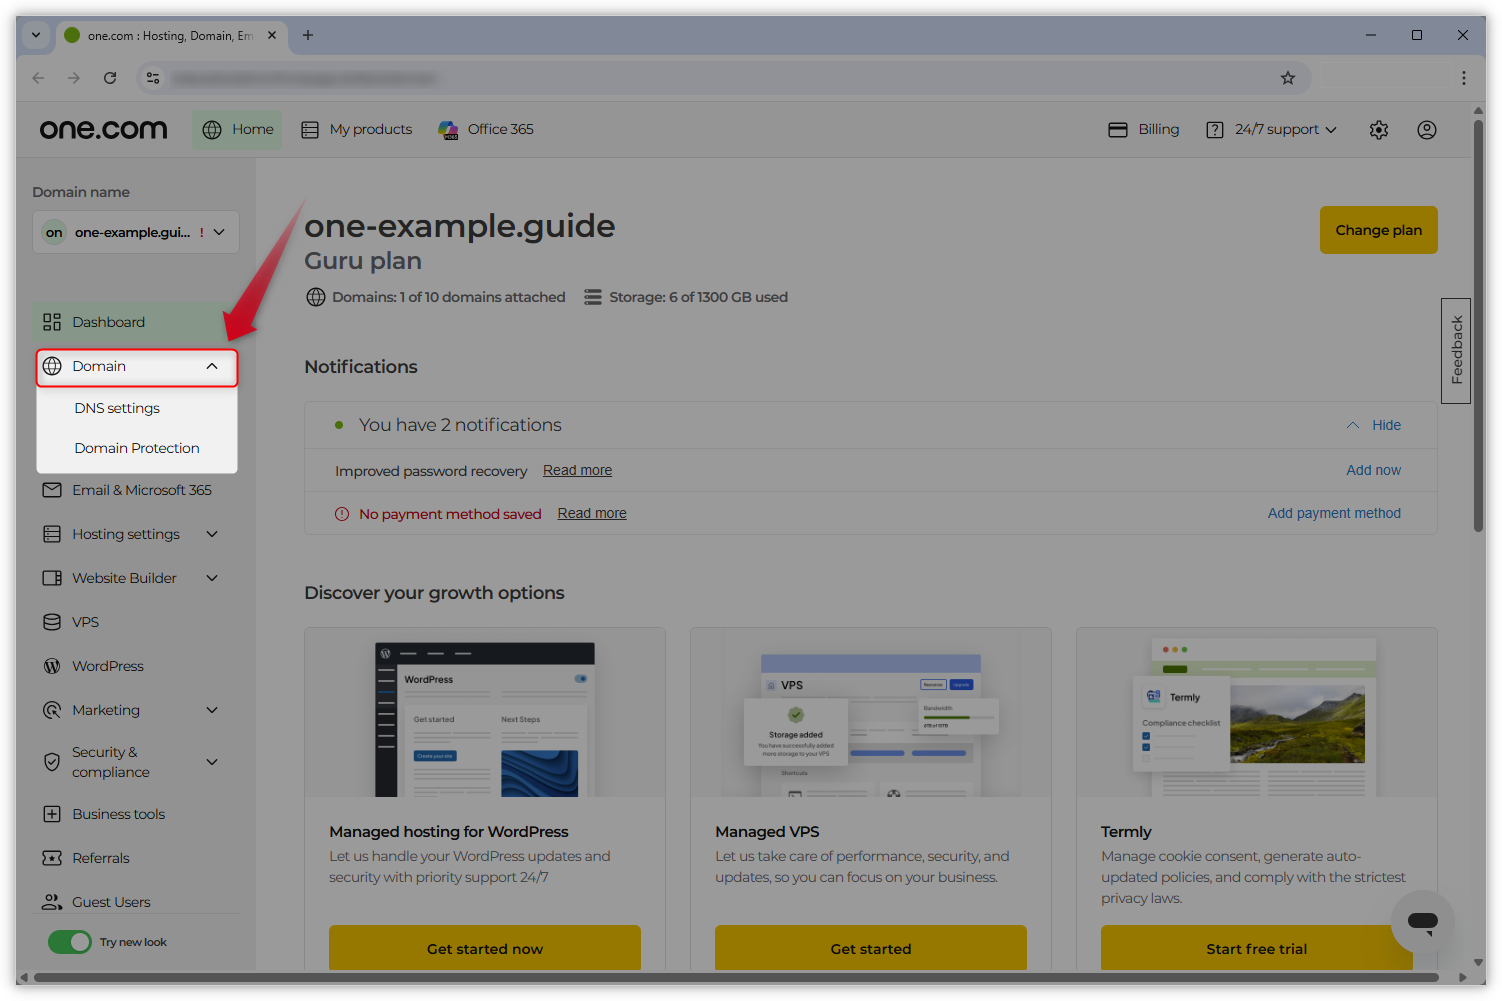
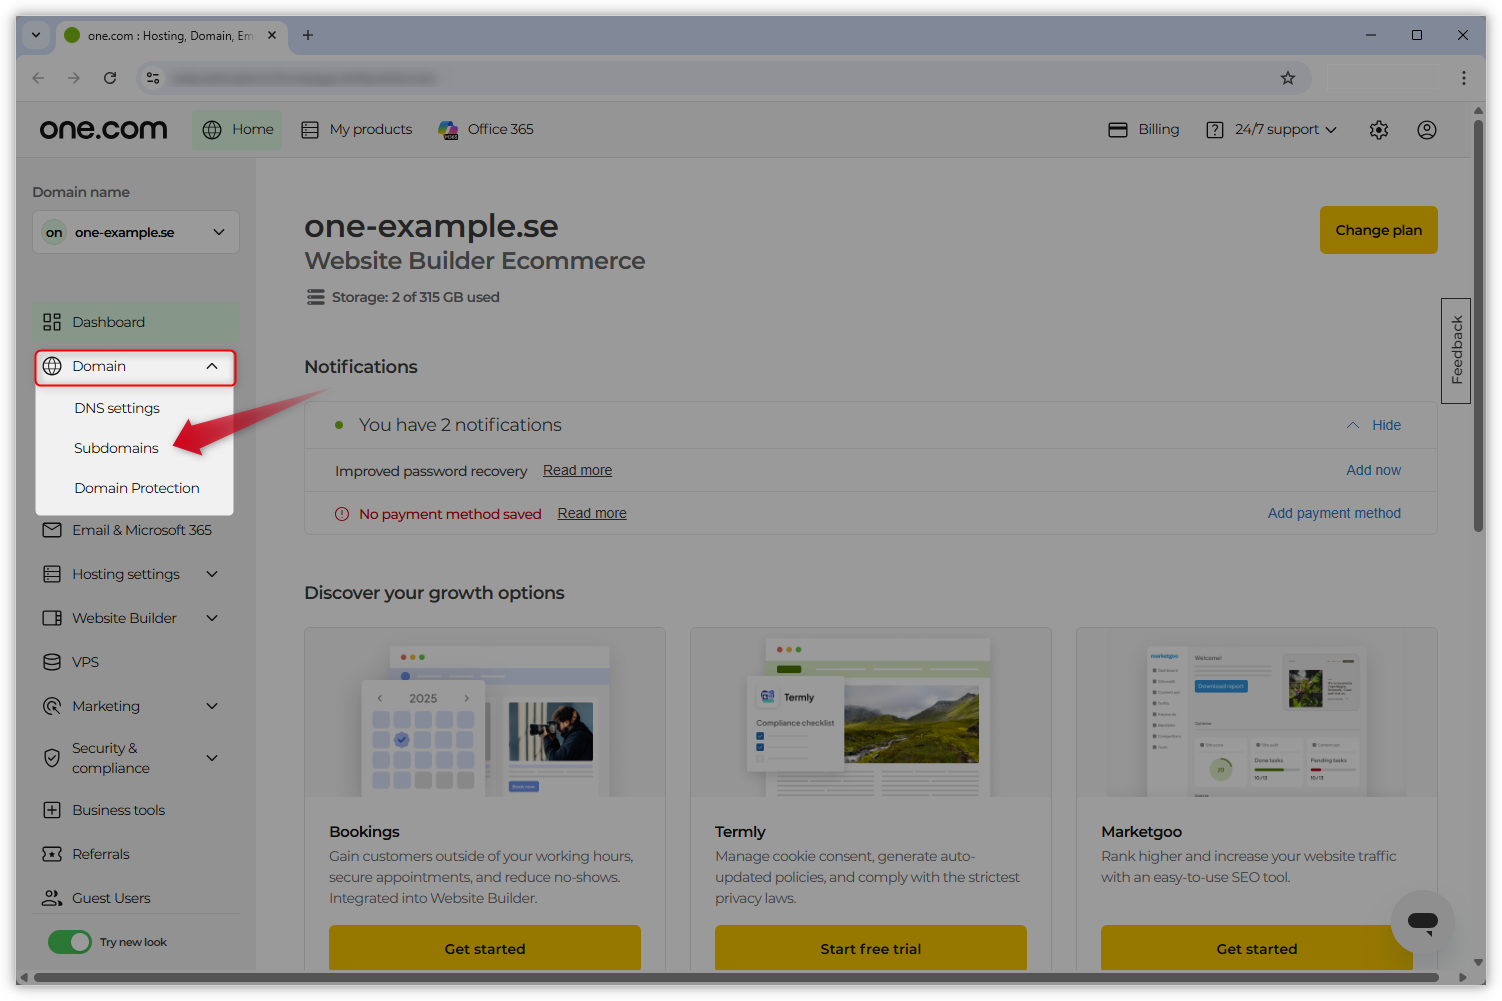
You can find this out easily by logging in to your one.com Control Panel: if you can see a Subdomains option under Domain, your website has already been migrated. See screenshots below for examples.
Non-migrated (no option for Subdomains under Domain)
Migrated
-
Instructions for non-migrated websites
Step 1 - Open the options table in your database
Note: Remember to make a backup of all files and tables in your database before you start.
- Log in to your one.com Control Panel and select Database settings under Hosting settings.
- Select your WordPress database in PhpMyAdmin and open the database.
- To access the table content list, click on the plus symbol next to the name of the database in the menu on the left.
- Select the table that ends on _options.
Note: If you have more than one WordPress installation on your web space, you need to check in your File Manager which table prefix you have to look for.
Step 2 - Edit the siteurl and home options
Next, your site's location will need to be changed in two places in the database.
- In this table that ends on _options, locate siteurl and home under the column option_name. Usually, these records are at the top of the table on lines 1 and 2.
- Start with siteurl and click Edit in the far left of this line, next to the pencil icon. This will open a window where you can see the field option_value. Replace the URL there with the new URL of your WordPress site. This will be the URL that users have to enter in their browser to visit your WordPress site.
- In this window, click Go on the bottom right to save changes.
Repeat the same steps for home.
Step 3 - Moving your WordPress site
The next steps depend on where you want to move your WordPress installation. Follow the steps for the option that applies to you.
- Option A - Moving your WordPress site from one subdomain to another subdomain
- Option B - Moving your WordPress site from a subdomain to the main domain
Option A - Moving your WordPress site from one subdomain to another subdomain
Edit folder in File Manager
Note: Follow this step if you are moving your WordPress site from one subdomain to another subdomain.
If you are moving your WordPress site from a subdomain to the main domain or vice versa, see option B.- Open your File Manager under Hosting settings in the menu on the left.
- Rename the folder of your WordPress site. It should get the name of the new subdomain on which your WordPress site will be published.
- Continue with Step 4 - Update permalinks.
Option B - Moving your WordPress site from a subdomain to the main domain
Move files in File Manager
Note: Follow this step if you are moving your WordPress site from a subdomain to the main domain or vice versa.
If you are moving your WordPress site from one subdomain to another subdomain, see option A.- Open your File Manager under Hosting settings in the menu on the left.
- Open the folder (subdomain) where your WordPress installation is currently published, select all files and subfolders, and move them into the main directory.
Note: If you are moving WordPress from the main domain to a subdomain, you have to create a folder for the subdomain, select all WordPress files in the main directory and move them into the folder for the subdomain.
Step 4 - Update permalinks
In order to prevent 404 errors on your WordPress site, we have to update the .htaccess file. To achieve this you have to update your permalinks.
- Log in to your WP Admin.
- Click Settings > Permalinks in the menu on the left.
- Scroll down to the button Save Changes and click on it to ensure that all subpages of your WordPress site will work without any issues.
Note: When you transfer an installation from a subdomain to the main domain, it is possible that the images on your website will disappear. This is because the URLs of the images in the content refer to the subdomain installation. In such cases, we suggest clearing all caches. If this doesn't solve the issue, please contact our support team for assistance.
Step 5 - Make a new connection to the Control Panel
Note: It is likely that your "old" website is still linked to your one.com Control Panel. If you attempt to log in through it, you will receive an error message. To solve this problem, you must establish a new connection. Prior to creating a new connection, verify in WP Admin that the one.com plugin has been installed.
- Log into the one.com Control Panel and click WordPress in the menu on the left. It will open the dashboard with the old connection between WordPress and the one.com Control Panel.
- To update this connection, you need to click on ← Back to overview to get to your installation overview.
- Choose New connection to start the process of connecting your current WordPress site to your one.com control panel.
- Specify if your existing WordPress page is on the main domain or a subdomain and click Connect or Next to continue.
- That's it! Your one.com Dashboard is now connected to your current WordPress site.
Step 6 - Done!
You have now successfully moved your WordPress site within the same domain.
Open your website in your browser and check if everything is working correctly. If you experience any difficulties, please reach out to our support.
-
Instructions for migrated websites
Step 1 - Open the options table in your database
Note: Remember to make a backup of all files and tables in your database before you start.
- Log in to your one.com Control Panel and select Database settings under Hosting settings.
- Select your WordPress database in PhpMyAdmin and open the database.
- To access the table content list, click on the plus symbol next to the name of the database in the menu on the left.
- Select the table that ends on _options.
Note: If you have more than one WordPress installation on your web space, you need to check in your File Manager which table prefix you have to look for.
Step 2 - Edit the siteurl and home options
Next, your site's location needs to be changed in two places in the database.
- In this table that ends on _options, locate siteurl and home under the column option_name. Usually, these records are at the top of the table on lines 1 and 2.
- Start with siteurl and click Edit in the far left of this line, next to the pencil icon. This will open a window where you can see the field option_value. Replace the URL there with the new URL of your WordPress site. This will be the URL that users have to enter in their browser to visit your WordPress site.
- In this window, click Go on the bottom right to save changes.
Repeat the same steps for home.
Step 3 - Move all files from the current (sub)domain of your website to the new (sub)domain
Note: If you want to move your site to a subdomain, but have not created the subdomain yet, read our guide How to create a subdomain manually.
In this step, you need to download all the files in the current location of your WordPress installation and upload them to the (sub)domain where you want to move the site. After that, you can delete the files from the original location.
1. Open the File Manager of the (sub)domain from which you want to move the site:
- If the site is currently located in a main domain: Log in to the one.com Control Panel of your domain, and click File Manager under Hosting settings. This opens your main domain's File Manager.
- If the site is currently located in a subdomain: Log in to the one.com Control Panel of your domain, and click Subdomains under Domain. In the list, find the subdomain where your WordPress site is located and click the link in the Folder column to open the subdomain in File Manager.
2. In File Manager, select all files and click Download. All the files of your WordPress website will now be downloaded to your device as a .zip file.
3. Next, open the File Manager of the (sub)domain to which you want to move the site:
- If you want to move your website to a main domain: In the one.com Control Panel of your domain, click File Manager under Hosting settings. This opens your main domain's File Manager.
- If you want to move your website to a subdomain: In the one.com Control Panel of your domain, click Subdomains under Domain. In the list, find the subdomain where your WordPress site is located and click the link in the Folder column to open the subdomain in File Manager.
4. In File Manager, click the blue Upload button and select the .zip file you just downloaded - it is most likely in the Downloads folder, or similar.
5. After the file has been uploaded, select it and click Unzip.
6. Open the unzipped folder. Select all files within it and move them to the main directory, where you uploaded the .zip file.
7. Delete the .zip file from your web space.
8. Next, you should delete the files from the (sub)domain where your site was located before. Before you do that, make sure that you still have the .zip file on your device as a back up in case of issues. Then, go back to the site's original location's File Manager and delete all the files there.
Step 4 - Update permalinks
In order to prevent 404 errors on your WordPress site, we have to update the .htaccess file. To do this you have to update your permalinks.
- Log in to your WP Admin.
- Click Settings > Permalinks in the menu on the left.
- Scroll down to the button Save Changes and click on it to ensure that all subpages of your WordPress site will work without any issues.
Note: When you transfer an installation from a subdomain to the main domain, it is possible that the images on your website will disappear. This is because the URLs of the images in the content refer to the subdomain installation. In such cases, we suggest clearing all caches. If this doesn't solve the issue, please contact our support team for assistance.
Step 5 - Make a new connection to the Control Panel
Note: It is likely that your "old" website is still linked to your one.com Control Panel. If you attempt to log in through it, you will receive an error message. To solve this problem, you must establish a new connection. Prior to creating a new connection, verify in WP Admin that the one.com plugin has been installed.
- Log into the one.com Control Panel and click on the WordPress tab in the menu on the left. It will open the dashboard with the old connection between WordPress and the one.com Control Panel.
- To update this connection, you need to click on ← Back to overview to get to your installation overview.
- Choose New connection to start the process of connecting your current WordPress site to your one.com Control Panel.
- Specify if your existing WordPress page is on the main domain or a subdomain and click Connect or Next to continue.
- That's it! Your one.com Dashboard is now connected to your current WordPress site.
Step 6 - Done!
You have now successfully moved your WordPress site within the same domain.
Open your website in your browser and check that everything is working correctly. If you experience any problems, please reach out to our support.
Related articles: